Thursday, October 22, 2015
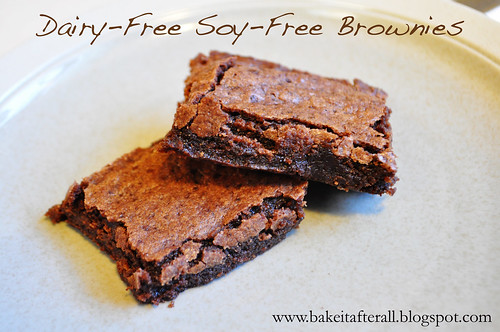
Dairy-Free Soy-Free Brownies (MSPI)
When Ella was a month old, she had a very scary vomiting incident that resulted in us taking her to the pediatric ER. Thankfully, she just had severe acid reflux. Medicine helped a little, but the most dramatic change happened after I removed dairy and soy proteins from my diet. I was happy to do what I could to help her while still nursing, but it was so difficult! Try finding prepared food that does not contain soybean oil or soy lecithin***(see note below). Even my favorite pasta sauce from Trader Joe's was off limits. My saving grace was stumbling across the blog called MSPI Mama.
MSPI stands for Milk Soy Protein Intolerance. This is not lactose intolerance, which is the inability to break down milk sugar, but rather an intolerance/allergy to milk proteins, which are closely mimicked by those in soy. It's actually pretty common in young babies and they usually grow out of it and are able to tolerate dairy proteins just fine. I had to be dairy/soy-free for about 4 months before being able to introduce them in small quantities. For what it's worth, Ella is now completely tolerant of dairy and soy - one of her favorite foods is cheese!
During those months, I had to completely overhaul how I cooked. Most of my recipes were off limits or had to be majorly revised. I never thought of myself as heavily dependent on dairy, but I guess I am. I felt very overwhelmed at the beginning and finding MSPI Mama was the biggest help. She has so many recipes that are MSPI friendly - even desserts! Once I identified a core group of recipes, I felt more in control and things became easier. Eating at restaurants, however, did not become easier and is one of the biggest challenges of MSPI. So many restaurants use soybean oil or butter (dairy) in things you wouldn't suspect.
This brownie recipes is one that I made quite often while eating the MSPI diet. The sugar cravings while nursing are no joke and still being able to enjoy desserts was a must. I figured I needed to "pay it forward" to other moms out there, frantically Google-ing for MSPI-safe recipes (likely while their new babies scream in their arms). I will be posting a handful of my favorite recipes - ones that are so good that they continue to be in our meal rotation despite the restrictions no longer being in place. These brownie are one of those recipes. They are so chocolatey and fudgey and have a nice crisp top on them. You certainly won't feel deprived eating these!
***Note: many people with a soy sensitivity can still eat soybean oil and soy lecithin but at the beginning I had to eliminate everything and then add things back.
Dairy-Free Soy Free Brownies (MSPI Friendly)
Ingredients:
1/2 cup Canola oil
1 cup white sugar
1 teaspoons vanilla extract
2 eggs
1/2 cup all-purpose flour
1/3 cup unsweetened cocoa powder
1/4 teaspoon baking powder
1/4 teaspoon salt
Directions:
1. Preheat oven to 350F. Grease a 9 x 9-inch baking pan.
2. In a medium bowl, mix together the oil, sugar and vanilla. Beat in the eggs.
3. In a separate bowl, combine flour, cocoa, baking powder and salt; gradually stir into the egg mixture until well blended.
4. Spread the batter evenly into the prepared pan. Bake for 20 - 25 minutes, or until the brownies begin to pull away from the edges of the pan.
5. Let cool completely on a wire rack then place in refrigerator to cool down even more. The brownies are best when they've had time to cool and develop their flavor.
Source: MSPI Mama, adapted from AllRecipes.com
Sunday, October 18, 2015
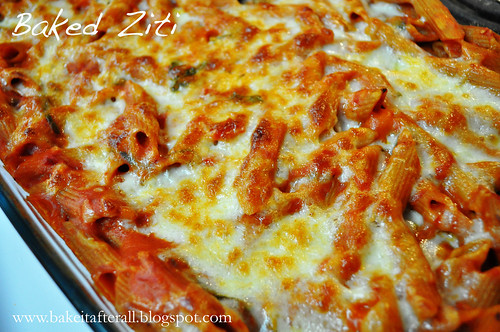
Baked Ziti
I started making this Baked Ziti when Bob and I were on a Sopranos kick many, many years ago. We had rented the last season from mail-order Netflix and watched multiple episodes a night. It was the influence of the Sopranos that led Bob to start referring to this recipe as "Meghan's Effing Ziti." Anyone who has seen this show will understand why. This makes a big pan of ziti - enough for the two of us for dinner and leftovers for lunch the rest of the week, so I like to make it on Sundays or Mondays. It's a great "Meatless Monday" meal!
Baked Ziti
Ingredients:
1 tablespoon olive oil
6 garlic cloves, minced
1/4 teaspoon red pepper flakes
Salt and ground black pepper
1 28-ounce can crushed tomatoes
3 cups water
12 ounces ziti (3 3/4 cups)
1/2 cup heavy cream (I usually use milk or fat-free half-and-half)
1/2 cup grated Parmesan cheese
1/4 cup minced fresh basil (or 1 tablespoon + 1 teaspoon dried)
1 cup shredded mozzarella cheese
Directions:
1. Adjust oven rack to middle position and heat oven to 475F.
2. Combine oil, garlic, pepper flakes, and 1/2 teaspoon salt in 12-inch ovensafe nonstick skillet and saute over medium-high heat until fragrant, about 1 minute. Add crushed tomatoes, water, ziti, and 1/2 teaspoon salt. Cover and cook, stirring often and adjusting heat as needed to maintain vigorous simmer, until ziti is almost tender, 15 to 18 minutes.
3. Stir in cream, Parmesan, and basil. Season with salt and pepper to taste. (At this point, I transfer the pasta to a 13x9-inch Pyrex dish). Sprinkle mozzarella evenly over pan. Transfer skillet to oven and bake until cheese has melted and browned, about 10 minutes. Serve.
Source: Adapted from The Best 30 Minute Recipe cookbook
Wednesday, October 14, 2015
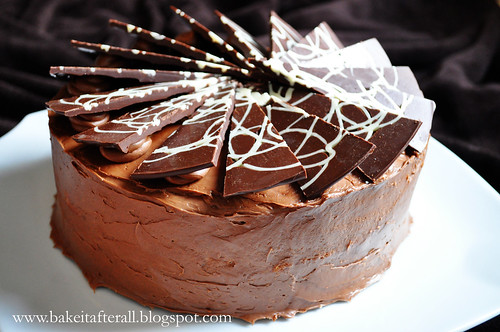
Mocha Cream Cake
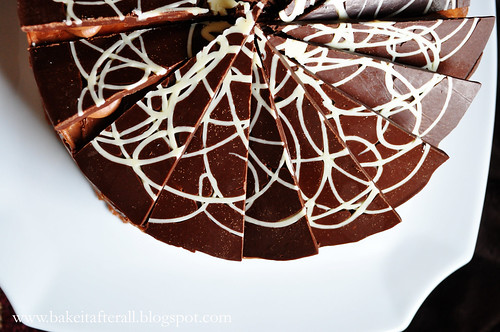
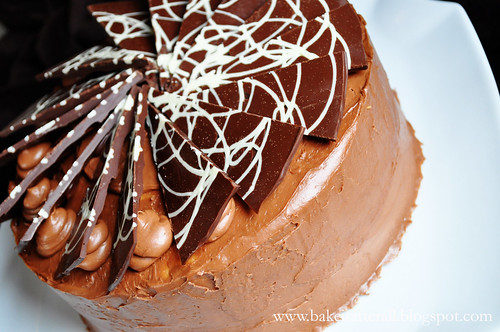
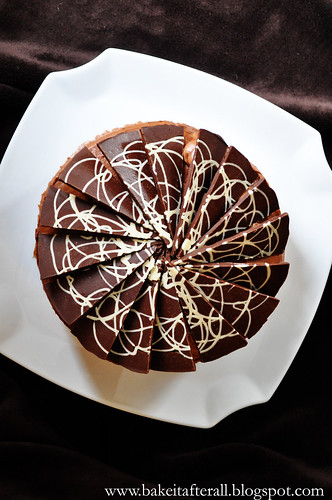
I almost always prefer chocolate cake over white or yellow, so if I were to make this again, I would use a chocolate cake as the base. The cream filling was really good, as was the ganache, so I would keep the rest of the recipe as is.
Mocha Cream Cake
Makes 16 servings
Ingredients:
1 package (18.25 ounces) white cake mix
Filling:
1 teaspoon unflavored gelatin
1 tablespoon cold water
1 1/4 cups heavy whipping cream
1/4 cup powdered sugar
2 tablespoons kahlua or other coffee-flavored liqueur
1/2 teaspoon vanilla extract
Ganche:
2 cups (11.5 ounces) milk chocolate chips
3/4 cup heavy whipping cream
1/4 cup butter
2 tablespoons kahlua or other coffee-flavored liqueur
Chocolate Triangles (see recipe below)
Directions:
1. Prepare cake batter according to package directions; bake in two 9-inch round pans as directed. Cool completely on wire racks.
2. For the filling: In a small bowl, combine gelatin and water; let stand for 2 minutes. Microwave on high for 10 seconds. Stir until gelatin is dissolved; set aside. In a large mixer bowl, combine the 1 1/4 cups cream, powdered sugar, kahlua, and vanilla. Beat at medium speed while slowly drizzling in gelatin mixture. Beat util stiff peaks form. Chill for several hours or overnight until ready to assemble.
3. For the ganache: In a small bowl, combine the milk chocolate chips, the 3/4 cup cream, and butter. Microwave for 3 minutes on medium-high (~70% power), stirring halfway through cooking time. Stir in kahlua. Chill for 45 to 60 minutes until thickened but still pourable. Beat with an electric mixer until spreadable, about 1 to 2 minutes.
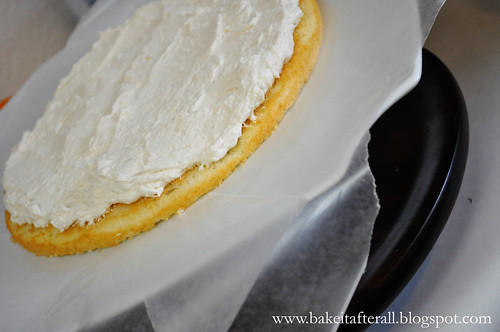
4. To assemble the cake: Split cooled cakes horizontally. Place one layer on serving plate. Spread half of the filling over the top.
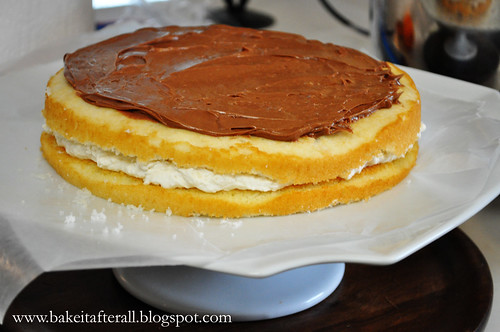
Top with the second cake layer. Spread about 1/2 cup of the ganache over the second layer.
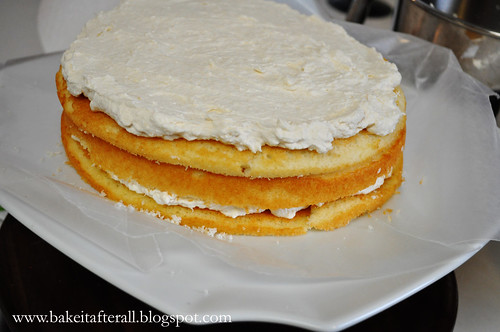
Top with the third cake layer and spread remaining filling over top.
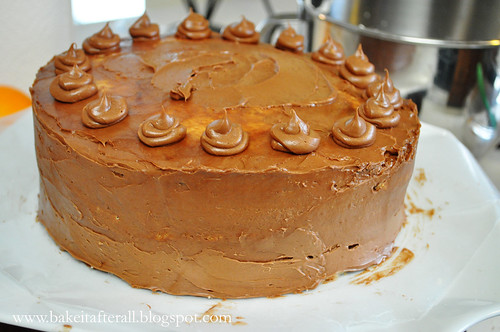
Reserve about 1/2 cup of the ganache. Spread remaining ganache over top and sides of cake. Use reserved ganache to make 16 evenly spaced dollops around top outer edge of cake.
Chocolate Triangles
Makes 16 triangles
Ingredients:
1 cup (6 ounces) semi-sweet chocolate chips
2 tablespoons solid shortening
1 1/2 squares (1 1/2 ounces) white chocolate
Directions:
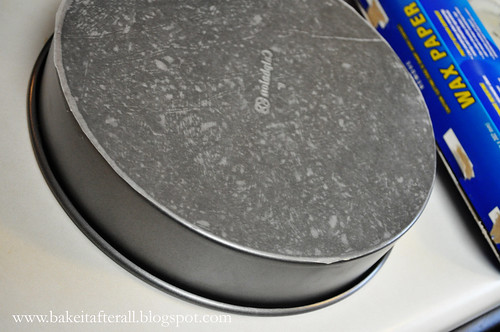
1. Cut a circle of waxed paper to fit the bottom of a 9-inch round cake pan. Lightly coat the outside bottom of the pan with butter (to keep the paper from moving); place waxed paper circle on bottom of pan.
2. Place semi-sweet chocolate and shortening in microwave-safe bowl. Microwave for 30 seconds on medium-high (~70% power); stir. Continue to microwave and stir in 30-second intervals until chocolate can be stirred smooth. Set aside to cool to room temperature.
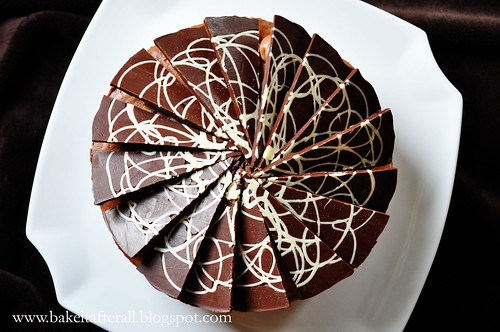
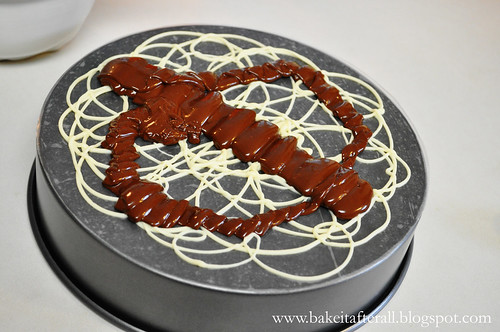
3. Melt white chocolate in a similar manner to the chocolate in step 2. Transfer to a piping bag with a small tip or a resealable plastic bag with a corner cut off. Make a squiggly design of white chocolate over the surface of the waxed paper. Chill on the pan until firm, about 5 minutes.
4. Spread the cooled chocolate in a smooth, even layer over the white chocolate squiggles. Chill for 15 to 25 minutes.
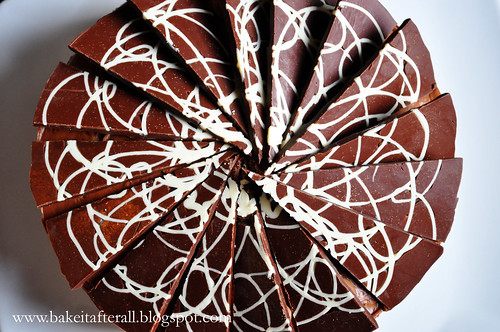
5. Transfer the chocolate disc to a cutting board. Using a large sharp knife, cut the chocolate into 16 wedges. Chill until ready to assemble cake. Remove waxed paper before arranging triangles with squiggle side up on cake.
Source: Dierberg's Markets "Everybody Cooks" Magazine
Sunday, October 11, 2015
Onion Strings
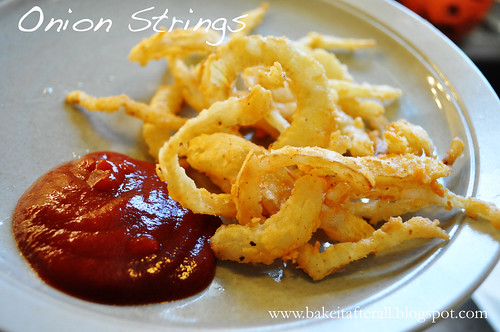
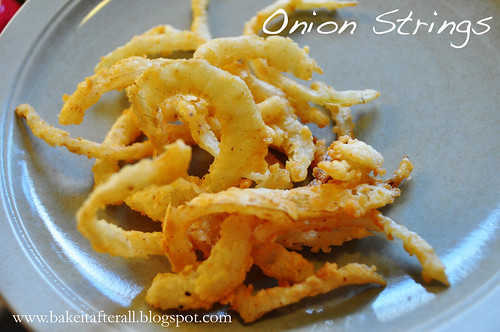
Each year, my sister and her husband join us for an Apple Cider Doughnut making day. It's one of my favorite days of the fall. In the last few years, we've decided that we may as well put the hot oil to good use and fry something else! We now follow up the doughnuts with these Onion Strings from the Pioneer Woman. They are so good, they may even beat the doughnuts...no seriously, they are that good! We only deep fry once a year, so you better bet we are getting the most out of it and making these. If you ever find yourself with a pot of hot oil, try these. They will not disappoint!
Onion Strings
Ingredients:
1 whole large onion, sliced very thinIngredients:
2 cups buttermilk
2 cups all-purpose flour
1 scant tablespoon table salt
1/4 - 1/2 teaspoon cayenne pepper
1 - 2 quarts Canola oil
Salt and freshly ground black pepper to taste
Directions:
1. Place sliced onions in a baking dish, cover with buttermilk, and soak for at least an hour.
2. Combine dry ingredients and set aside.
3. Heat oil to 375F in a Dutch oven. Grab a handful of onions, throw into the flour mixture, tap to shake off excess, and plunge into hot oil. Fry for a few minutes and remove as soon as golden brown. Season with salt and pepper as desired and serve immediately.
4. Repeat with remaining onions.
Wednesday, October 7, 2015
Cauliflower Crust Pizza
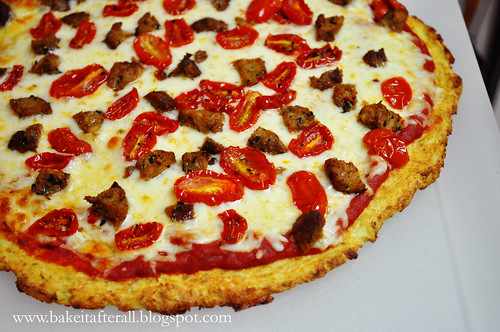
Cauliflower Pizza Crust is all over Pinterest and has piqued my interest on multiple occasions. I actually made this over two years ago and found the image file when hunting through some old files. This crust turned out really well. I find making cauliflower rice and squeezing out the water to be bit labor intensive, but it actually isn't that bad. Make sure you immediately rinse the towel you use to squeeze the moisture out of the cauliflower. I set mine aside and forgot about it and it smelled awful the next morning! I topped my Cauliflower Pizza Crust with pizza sauce, mozzarella, turkey sausage, and Oven-Dried Tomatoes. Delish!
Cauliflower Pizza Crust
Ingredients:
2 pounds cauliflower florets, riced
1 egg, beaten
1/3 cup shredded mozzarella
1 teaspoon dried oregano
pinch of salt
Directions:
Preheat oven to 400F.
1. To make the cauliflower rice, pulse batches of raw cauliflower florets in a food processor, until a rice-like texture is achieved.
2. Fill a large pot with about an inch of water, and bring to a boil. Add the "rice" and cover; let cook for about about 4 - 5 minutes. Drain into a fine-mesh strainer.
3. This is the secret: Once you've strained the rice, transfer it to a clean, thin dishtowel. Wrap up the steamed rice in the dishtowel, twist it up, then squeeze all the excess moisture out.
4. In a large bowl, mix up your strained rice, beaten egg, mozzarella cheese, and spices. It will not be the consistency of typical pizza dough.
5. Press the dough out onto a baking sheet lined with parchment paper. (It's important that it's lined with parchment paper, or it will stick.) Keep the dough about 1/3-inch thick, and make the edges a little higher for the crust. Bake for 35 - 40 minutes. The crust should be firm and golden brown when finished.
6. Top crust as desired. Return the pizza to the oven, and bake an additional 5 - 10 minutes, until the cheese is hot and bubbly. Slice and serve immediately.
Time-Saving Tip: make a double-batch of cauliflower pizza crusts and save one for later. After baking the crusts, wrap up the extra pizza crust in foil, and freeze it for later use. Simply add toppings and bake at 400F, until the cheese is hot and bubbly.
Source: Adapted from Detoxinista
Sunday, October 4, 2015
Garlic-Braised Chicken Thighs with Roasted Carrots
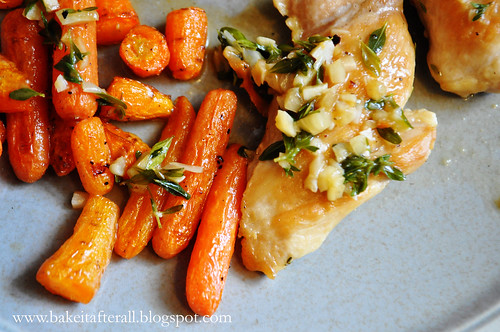
I found this recipe on Pinterest when searching for ways to use the carrots in our garden. This recipe was actually a meal from a Whole30 plan. While a Whole30 is not exactly my style, I do appreciate some of the Whole30-friendly recipes. The whole family eats this dinner every time I make it. The girls LOVE these carrots! They typically will not eat carrots, but they can't get enough of these. We did compare the grocery store baby carrots to those we grew in our garden, and the ones from our garden do taste better, but any carrot will do. The garlic thyme pan sauce here really elevates the dish, so don't skip that part!
Braised Chicken Thighs with Garlic Pan Sauce and Roasted Carrots
Ingredients:
olive oil
1 - 1 1/2 pounds boneless, skinless chicken thighs
salt and pepper to taste
bunch of fresh thyme, leaves removed and coarsely chopped
3 cloves of garlic, chopped fine
1 1/2 cups chicken stock/broth, divided
1 pound baby carrots or 5 whole carrots, peeled and cut into small pieces
olive oil
salt and pepper to taste
Directions:
Preheat oven to 350F.
1. Heat olive oil in a large saucepan or skillet that has a lid (set the lid aside for now).
2. Line a baking sheet with foil and place carrots on the foil. Toss with olive oil and season with salt and pepper. Bake the carrots for 20 - 25 minutes, turning and mixing them every 5 - 10 minutes so they brown evenly.
3. Meanwhile, place chicken “pretty side” down in hot skillet, sprinkle with salt and pepper, and sauté for 5 - 8 minutes, until browned on one side. Flip chicken and cook until brown on the other side, then add 1 cup of the chicken stock/broth to the pan. Reduce the heat to medium-low and place the lid on the pan to allow the chicken to cook through. The stock will begin to reduce.
4. When chicken is cooked thoroughly (registers at least 165F with an instant-read thermometer/Thermapen), remove to a plate and set in a warm place (I put mine in the microwave NOT turned on!).
5. Add thyme, garlic, and remaining 1/2 cup chicken stock/broth to pan sauce, turning heat to high. Cook uncovered for about 5 minutes, or until the liquid thickens into a gravy.
6. Add the cooked chicken thighs back to the pan with the sauce. Spoon sauce over the chicken.
7. To serve, pour sauce over both chicken and carrots. Sprinkle extra fresh thyme if desired.
Source: Adapted from Eat the cookie!
Subscribe to:
Posts (Atom)
