Search This Blog

Wednesday, December 12, 2012

Santa's Whiskers Cookies

DSC_0172


DSC_0176


My mom got this recipe from a friend many years ago. She always added the pecans, so I never tried them as a kid due to my allergy. A few years ago I requested that she make some without nuts so I could try them. I had been missing out all these years! These cookies consist of a buttery cookie base, and the chopped candied cherries give them a chewiness, which is nicely complemented by the crunchy coconut exterior. Plus, aren't they so festive?! These cookies have now become a part of my Christmas baking tradition!

Hope you have a wonderful holiday season!  Here is a picture of Ava with Santa from this weekend :-)


And a happier one after the bearded man was out of sight:


Santa's Whiskers Cookies

Ingredients:
1 cup butter
1 cup sugar
2 Tbsp. milk
1 tsp. vanilla extract
2 1/2 cups flour
3/4 cup finely chopped red and green candied cherries (about 1/2 of small container of each)
1/2 cup chopped pecans (optional)
3/4 cup coconut

Directions:
1. Cream butter, sugar, milk, and vanilla extract.  

2. Add flour, cherries, and pecans (if using).

3. Form into 2 rolls each 2 inches in diameter and 8 inches long.  Roll in coconut.  

DSC_0163


4. Wrap in waxed paper.  Chill several hours.  

5. Slice 1/4" thick, place on ungreased cookie sheet.  

DSC_0164


DSC_0160


DSC_0156


6. Bake at 375F for 10 - 12 minutes.  

Makes 5 dozen.


Source: my mom's friend


DSC_0182


Monday, September 3, 2012

Ultimate Banana Bread

DSC_0003_ed

DSC_0033_ed

DSC_0029_ed

DSC_0023_ed


My dad is a big fan of America's Test Kitchen.  He doesn't cook but rather uses the show to get ideas of things for my mom and I to make him :-)  He saw this banana bread on an episode of ATK and immediately begged me to make it.  Luckily I have a subscription to Cook's Illustrated online and was able to find the recipe.  

This recipe takes more work than your typical banana bread, requiring a microwaving step to release the liquid from the bananas, and then a step making a reduction from this liquid.  This microwave step can be avoided if you use frozen bananas, which I happened to have in my freezer awaiting such an occasion.  

This bread is super moist and has a true banana flavor, as ATK intended.  My dad and his friend were at our house doing some work in the basement after I had made this loaf.  They took a snack break and my dad's friend said it was the best banana bread he's ever had!  That certainly justifies the additional steps!  

Ultimate Banana Bread

Makes one 9-inch loaf

Notes: Be sure to use very ripe, heavily speckled (or even black) bananas in this recipe. This recipe can be made using 5 thawed frozen bananas; in this case skip the microwave step and go straight to straining. Do not use a thawed frozen banana in step 4; it will be too soft to slice. Instead, simply sprinkle the top of the loaf with sugar. The texture is best when the loaf is eaten fresh, but it can be stored (cool completely first), covered tightly with plastic wrap, for up to 3 days.

Ingredients:
1 3/4 
cups (8 3/4 ounces) unbleached all-purpose flour
1
 teaspoon baking soda
1/2 
teaspoon table salt
6 
large very ripe bananas (about 2 1/4 pounds), peeled (see note)
8
 tablespoons (1 stick) unsalted butter, melted and cooled slightly
2 
large eggs
3/4 
cup (5 1/4 ounces) packed light brown sugar
1 
teaspoon vanilla extract
2 
teaspoons granulated sugar

Directions:
1. Adjust oven rack to middle position and heat oven to 350F. Spray a standard loaf pan with nonstick cooking spray.

2. Whisk flour, baking soda, and salt together in large bowl.

3. Place 5 bananas in microwave-safe bowl; cover with plastic wrap and cut several steam vents in the plastic. Microwave on high until bananas are soft and have released liquid, about 5 minutes. Transfer bananas to fine-mesh strainer placed over medium bowl and allow to drain, stirring occasionally, 15 minutes (you should have ½ to ¾ cup liquid).

4. Transfer liquid to medium saucepan and cook over medium-high heat until reduced to ¼ cup, about 5 minutes. Remove pan from heat, stir reduced liquid into bananas, and mash with potato masher until fairly smooth. Whisk in butter, eggs, brown sugar, and vanilla.

5. Pour banana mixture into flour mixture and stir until just combined with some streaks of flour remaining. Scrape batter into prepared pan. Slice remaining banana diagonally into ¼-inch-thick slices. Shingle banana slices on top of either side of loaf, leaving 1½-inch-wide space down center to ensure even rise. Sprinkle granulated sugar evenly over loaf.

6. Bake until toothpick inserted in center of loaf comes out clean, 50 to 75 minutes. Cool bread in pan on a wire rack 15 minutes, then remove the loaf from the pan and continue to cool on a wire rack. Serve warm or at room temperature.

Source: America's Test Kitchen

Wednesday, August 29, 2012

Skinny Chocolate Chip Scones

DSC_0178_ed

DSC_0182_ed 

I think I came across this scone recipe on Pinterest and couldn't get it out of my mind.  I had to make them immediately.  I've made Chocolate Chip Scones before and loved them, but I liked the idea of making them a tad healthier by using part whole wheat flour and a few other substitutes. Don't get me wrong, it's hard to beat a classic scones, but if you're in the mood for scones and not feeling overly indulgent, these are a great alternative.  Plus, it's always nice to sneak chocolate into breakfast! We really enjoyed these scones, and I'm happy to have this recipe on hand.

Skinny Chocolate Chip Scones

Ingredients:
3/4 cup cold buttermilk
1/4 cup sugar
2 teaspoons vanilla extract
1 large egg
1 cup all-purpose flour
1 cup white whole wheat flour
1 tablespoon baking powder
1/2 teaspoon salt
3 tablespoons cold butter, but into small pieces
3/4 cup chocolate chips
cooking spray
1 large egg white, lightly beaten
1 1/2 tablespoons sugar

Directions:
1. Preheat oven to 375F. Spray a baking sheet with cooking spray or line with a piece of parchment paper.

2. Combine the first four ingredients in a medium bowl, stirring with a wire whisk.

3. Combine flour, baking powder, and salt in a large bowl, whisking to combine.  Cut in the chilled butter with a pastry blender (or 2 knives) until the mixture resembles coarse meal.

  DSC_0157_ed  

Gently fold in chocolate chips.

4. Add buttermilk mixture to dry mixture, stirring just until moist.

5. Place dough onto a floured surface and knead lightly four times with floured hands. Form dough into a 9-inch circle onto the baking sheet, about 3/4-inch thick.

  DSC_0159_ed 

Using a knife, cut dough into 12 wedges all the way through.

6. Brush egg white over dough and sprinkle evenly with sugar.

  DSC_0164_ed 

Bake until golden, about 18 - 20 minutes, depending on your oven.  Serve warm.

Source: SkinnyTaste.com

Sunday, August 26, 2012

BBQ Chicken Pizza

DSC_0235_ed 

It's certainly been a while since I last posted, but we've had a super busy summer!  Being a working mom has forced me to come up with simple, quick dinners for the week that don't require us spending half the night prepping in the kitchen (and the other half cleaning up all those dishes!)  I'm excited to share one of favorite dinners we've been making lately, and it's actually pretty quick and manageable for a weeknight!

My friend Kathleen gave me this recipe for BBQ Chicken Pizza, and it reminded me of the version from California Pizza Kitchen.  This is such a simple pizza to throw together, but the flavors are fresh, bold, and oh-so-tasty!

Typically homemade pizza is not my idea of a weeknight meal, but hear me out.  One of our favorite go-to summer dinners is to marinate chicken breasts in Italian dressing and cook them on the grill.  We like to double the amount of chicken and save half for another meal.  Here's a wise tip I learned for working moms: "cook once, eat twice" - it's so true!  And if you can repurpose what you've cooked to create two different meals, that's even better in my book.

Having the chicken already cooked is a huge time-saver, so let's move on to the other time-suck: the dough.  My favorite pizza dough recipe makes enough for two large pizzas, so make a batch on a weekend, freeze the dough, and move the bag of frozen dough from the freezer the the fridge the morning you plan to make your pizza.  Now all that's left is chopping some onion and cilantro!  A quick dinner that tastes like you spent hours in the kitchen!

BBQ Chicken Pizza

Ingredients:
1/2 batch pizza dough
1 - 2 chicken breasts, cooked and chopped*
your favorite BBQ sauce, amount varies
shredded Colby cheese (approx. 2 cups)
1/2 red onion, finely chopped
cilantro, chopped, for finishing

*In a pinch, you can use precooked chicken strips from your grocery's deli!

Directions:
1. Place pizza stone in a cold oven.  Heat oven to 500F and preheat stone for at least 30 minutes, preferably 60 minutes (if you have time!).

2. Shape dough into a large round on a piece of parchment paper.  Brush crust lightly with olive oil.

3. Top dough with BBQ sauce as you would do with traditional pizza sauce.  Add chopped chicken, chopped red onion, and shredded cheese.

4. Transfer pizza onto a baking sheet or pizza peel and slip onto the preheated baking stone.  Bake for 10 - 12 minutes (watch closely as ovens vary) until cheese is melted and crust is golden brown.

5. Slide pizza onto baking sheet or pizza peel and transfer to a large cutting board surface. Allow to cool for several minutes, slice, and top with fresh cilantro.  ENJOY!


Wouldn't you rather spend your time looking at this face than slaving over a hot stove??? :-)

DSC_0117_2

DSC_0209_2

Thursday, April 26, 2012

Fresh Fruit Tart

DSC_0362_ed

DSC_0358_ed

This tart has been a long time in the making. I first saw it on 
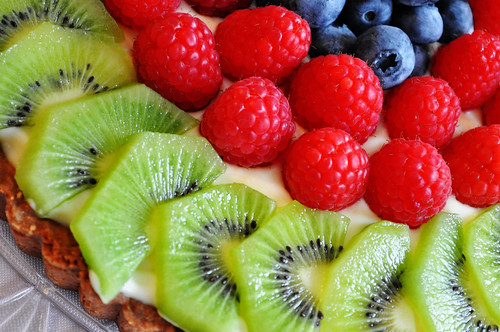
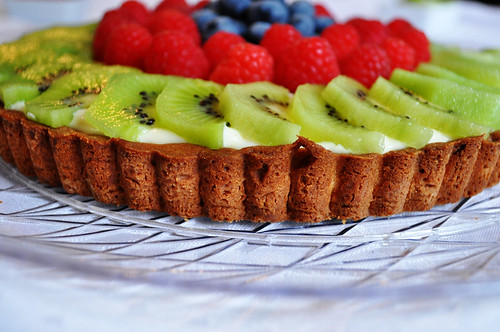
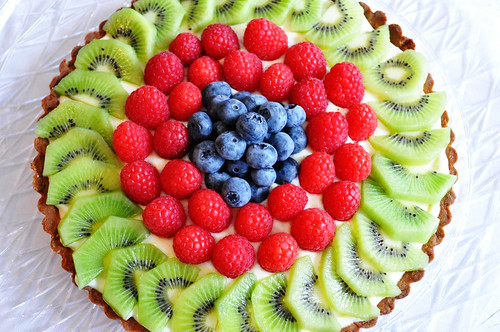
Annie's Eats several years ago and immediately wanted to make it, but if you're anything like me, your list of desserts to make could take several years to get through!  Then my Dad gave me my beloved America's Test Kitchen Cookbook and guess what?   The tart again.  Taunting me with it's beautiful concentric arrangement of fruit!  I finally gave in last summer and made it, and it was just as delicious as I imagined.  If you've never had homemade vanilla pastry cream, you must try it!  As it seems with many things these days, posting this tart took a backseat, but I'm finally ready to share it.  The weather is getting warmer, and the season for delicious fresh fruit is approaching.  Don't follow my lead and let this dessert slip by!  You can top it with any fruit you like.  I'm envisioning a red, white, and blue theme (if you replace the kiwi with more blueberries, for example) - perfect for all those summer BBQs! 

DSC_0348_ed

DSC_0347_ed

DSC_0330_ed

Fresh Fruit Tart

Note: America's Test Kitchen states that the pastry cream can be made a day or two in advance and stored in the refrigerator but recommends that the tart shell not be filled and topped with fruit until approximately 30 minutes before serving.

Ingredients:
For the pastry cream:
2 cups half-and-half
1/2 cup granulated sugar
pinch table salt
5 large egg yolks,
3 tablespoons cornstarch
4 tablespoons unsalted butter, cold and cut into 4 pieces
1 1/2 teaspoons vanilla extract

For the tart shell:
1 large egg yolk
1 tablespoon heavy cream
1/2 teaspoon vanilla extract
1 1/4 cups unbleached all-purpose flour (6 1/4 ounces)
2/3 cup confectioners' sugar (~3 ounces)
1/4 teaspoon table salt
8 tablespoons unsalted butter (1 stick), very cold and cut into 1/2-inch cubes

For the fruit and glaze:
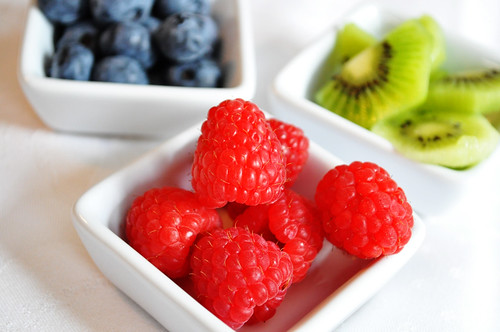
Fruit of your choice, such as raspberries, blueberries, and kiwis
1/2 cup red currant or apple jelly for glazing (optional)

Directions:
1. For the pastry cream: Bring to a simmer the half-and-half, 6 tablespoons sugar, and salt in a medium saucepan over medium heat, stirring occasionally to dissolve sugar.

2. Meanwhile, whisk the egg yolks in a medium bowl, then add remaining 2 tablespoons of sugar and whisk until it has started to dissolve and mixture is creamy, ~15 seconds.  Whisk in cornstarch until combined, about 30 seconds, and mixtures turns a thick, pale yellow.

3. When the half-and-half mixture has reached a full simmer, gradually whisk it into the egg mixture, which will temper it.  Return this combined mixture to the saucepan, making sure to scrape the bowl with a rubber spatula to transfer the entire amount.  Return to a simmer over medium heat, whisking constantly, until a few bubbles burst on the surface and the mixture thickens and becomes glossy, ~ 30 seconds.  Important note: this took longer than 30 seconds to come together for me.  The important thing is not the actual time but rather that you continue to cook until the mixture thickens - it should become the consistency of pudding.  If it's not, keep going (making sure to whisk constantly).  The refrigeration step will help set the pastry cream, but if it's not thick at this point, it won't thicken enough upon chilling, so cook until it thickens.  If you're wondering if it has thickened, it probably hasn't because it's pretty obvious and happens quickly :)

4. Remove pastry cream from heat and whisk in butter and vanilla.  Pour it through a fine mesh sieve set over a medium bowl to remove any lumps or egg clumps.  The easiest way to get it through the sieve is to whisk it through. Press plastic wrap directly on the surface (to avoid getting a "skin" on top - just like pudding!), and refrigerate the pastry cream until cold and set - minimum of 3 hours and maximum of 48 hours.

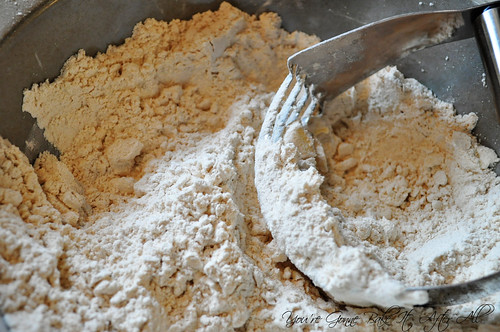
5. For the tart pastry:  Whisk together the egg yolk, cream, and vanilla in a small bowl and set aside. In the bowl of a food processor, pulse to combine the flour, sugar, and salt.  Scatter the pieces of butter over the flour mixture, and pulse until the mixture resembles coarse meal, about fifteen 1-second pulses.  With the food processor running, add the egg mixture and process just until the dough comes together, ~25 seconds.  Remove dough to a piece of plastic wrap and press into a 6-inch disk, wrap up, and refrigerate for a minimum of 1 hour, maximum of 48 hours.

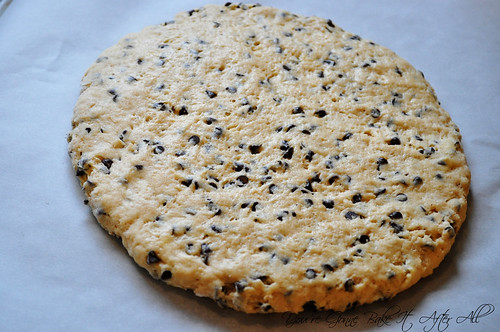
6. Remove the dough from the refrigerator. If it has been longer than 1 hour, let the dough stand at room temperature until it is malleable.  Unwrap the disk and roll it out into a 13-inch round between 2 pieces of floured parchment paper.  If the dough becomes soft and sticky, slip it into the refrigerator until for another 20 - 30 minutes before proceeding.

7. Transfer the dough to a tart pan (9- or 9 1/2-inch diameter pan with removable bottom).  To easily transfer dough, wrap it loosely around a rolling pin and carefully unwrap over the pan.  Ease the dough into the pan edges and press it into the fluted sides.  Run the rolling pin over the top of the tart to remove the excess dough that hangs over the top edge.  Set pan on a plate and freeze for 30 minutes. (You may also put the pan in a gallon-sized resealable plastic bag and freeze for up to 1 month!)

8. Adjust an oven rack to the middle position and heat to 375F. Set the dough-lined tart pan on a baking sheet and place a 12-inch square of aluminum foil over the surface of the dough, putting pie weights inside to keep the foil on the dough surface.  Bake for ~30 minutes until golden brown, rotating half way through. Remove from oven, carefully remove pie weights and foil, and continue baking until deep golden brown in color, about 5 - 8 more minutes. Set the baking sheet with the tart shell on a wire rack to cool to room temperature, about 30 minutes.

9. To assemble the tart: When the tart shell has cooled completely, spread the cold pastry cream over the bottom.  Arrange the fruit on top of the pastry cream as desired.

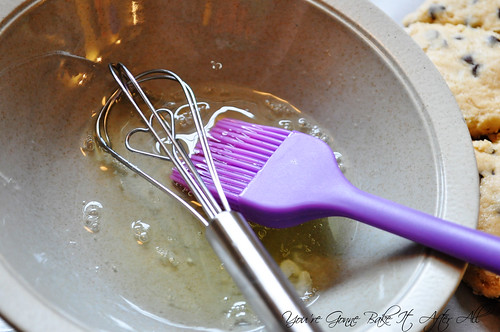
10. To glaze (optional): Bring the jelly to a boil in a small saucepan, stirring occasionally to remove lumps. When jelly has melted, use a pastry brush to brush it over the fruit. You may add 1 teaspoon of water to the jelly and re-boil if it becomes too thick.

11. To serve: Remove outer ring of tart pan and slip tart onto a serving platter.  You may leave the bottom of the pan for serving, but I prefer to remove it to avoid knife cuts on my pan.  To remove the tart from the bottom of the pan, try using Kerstin's method of sliding a piece of dental floss or fishing line between the pan and the tart!  ATK recommends serving tart within 30 minutes of assembling.  I waited an hour or so and it seemed fine...

Source:  Adapted from Annie's Eats and America's Test Kitchen Complete TV Show Cookbook

Thursday, February 16, 2012

Browned Butter Sugar Cookies

DSC_0470_ed

DSC_0472_ed

DSC_0490_ed

I received the Baking Bites Cookbook in a giveaway about a year ago. I want to make just about every recipe in the book! I decided on these sugar cookies to take to a pool party this past summer. I had never made browned butter before, but I wanted to try it. (Probably the only thing I had ever eaten with browned butter was some lobster potstickers with a browned butter miso sauce from Roy's - so incredibly good.)

My mom said these were one of her favorite cookies! She had a similar positive reaction to Nicole's Mexican Chocolate Black Bottom Cupcakes, so I suspect my mom might love anything from this cookbook!

These cookies were chewy and had great flavor and texture. The original recipe uses half a vanilla bean in the melted butter mixture during the browning process. I don't have vanilla beans on hand and opted to skip it since they are pretty expensive. I'm sure the vanilla flavor would have been fantastic though, so if you have some on hand, try it and let me know! :)

Browned Butter Sugar Cookies

Yield: approximately 2 dozen

Ingredients:
1/2 cup butter, room temperature
1 cup all-purpose flour
1/2 teaspoon baking powder
1/4 teaspoon salt
1 cup sugar
1 large egg
1 teaspoon vanilla extract

Directions:
Preheat oven to 350F.
1. Line a baking sheet with parchment paper.

2. Add butter to a small saucepan and cook over medium-low heat until butter begins to melt. Continue to cook butter until it has turned an amber color and smells toasty but not burnt. The butter will darken quickly once it begins to turn golden, so watch carefully.

3. Pour butter from the saucepan into a small bowl, scraping the browned bits from the bottom of the pan with a spatula. Allow to cool for 10 - 15 minutes.

4. In a medium bowl, whisk together flour, baking powder, and salt.

5. In a large bowl, whisk together the sugar, egg, and vanilla extract. Add the cooled butter. Stir in flour mixture, mixing only until no streaks of flour remain.

6. Drop 1-inch balls onto prepared baking sheet. Bake for 10 - 12 minutes, until the edges are set and just start to brown.

7. Cool cookies on a wire rack.

Source: Adapted from the Baking Bites Cookbook

Sunday, February 12, 2012

Chocolate-Covered Strawberries

DSC_0453_ed

DSC_0452_ed

DSC_0451_ed

With Valentine's Day coming up, I thought it was the perfect time to share this recipe for homemade chocolate-covered strawberries. The concept and method are simple, but people spend an inordinate amount of money on these at candy shops around Valentine's Day - why not make them at home!

I made these chocolate-covered strawberries for my sister's bridal shower last year. I had never made them before and was pleasantly surprised by how easy it was and how good they tasted. Making them at home allows you to choose the type of chocolate you use and know exactly what's going into them. I love adding the white chocolate stripes (idea courtesy of Annie) - they make them look more elegant.

Chocolate-Covered Strawberries

*I'm not providing exact amounts because it varies greatly depending on how large the strawberries are and how much chocolate you like on them. Ina Garten recommends 6 ounces of dark chocolate for 12 large (long-stemmed) strawberries.

Ingredients:
strawberries
chocolate of choice (semi-sweet, bittersweet, or milk) - bars or chips

For the white chocolate drizzle:
white chocolate chips
vegetable shortening or oil

Directions:
1. Wash strawberries and dry well by allowing to air dry on a paper towel or using paper towels to gently pat dry.

2. To make tempered chocolate, chop the chocolate into pieces (or use chocolate chips) and place 3/4 of it in a small glass bowl in a microwave for 20 seconds exactly. Stir the chocolate and continue to microwave for 20 seconds at a time, stirring in between, until the chocolate is smooth and shiny.

3. Add the remaining 1/4 of the chocolate and stir until smooth. This will temper the chocolate to preserve texture and appearance.

4. Dip each strawberry into the tempered chocolate and place on a sheet pan covered with parchment or waxed paper. Refrigerate for 2 minutes to set.

5. To make the drizzle: Melt the white chocolate chips in the microwave until just melted. Add a small amount (about 1/2 teaspoon) vegetable shortening or oil and stir until smooth. Transfer the white chocolate to a pastry bag or resealable plastic bag with the tip cut off. Drizzle white chocolate over each strawberry to make stripe design. In my experience, it's important to work quickly with white chocolate because it seizes up more quickly than regular chocolate.

6. Refrigerate strawberries until ready to serve. Best if eaten within 24 hours.

Source: Adapted from Ina Garten

Happy Valentine's Day!!!

Ava_Hearts

DSC_0799

Sunday, February 5, 2012

Chicken Lettuce Wraps - Revisited

DSC_0827_ed\\

DSC_0802_ed

Just over a year ago I posted a P.F. Chang's copycat recipe for Chicken Lettuce Wraps, but I already feel it's time to revisit this recipe. First of all, this has become one of Bob and my favorite dinners, and we've adapted the recipe to suit our tastes and rewritten it in a more logical way. Second of all, I was never happy with the picture I took. I was using a new light box I had made and the coloring was off. Since getting my new camera, I decided to re-photograph these wraps, and I'm much happier with the outcome. These wraps are seriously delicious, and I highly recommend the recipe!

Chicken Lettuce Wraps

Ingredients:
For the wraps:
2 tablespoons Canola oil, divided
1 package (1 pound) ground chicken breast
1 can sliced water chestnuts, minced into the size of peas
2/3 cup mushrooms (I usually use 1 package fresh mushrooms), minced into the size of peas
3 tablespoons chopped onion
1 teaspoon minced garlic
4-6 iceberg or butter lettuce leaves

For the special sauce:
2 tablespoons sugar
1/4 cup water
1 tablespoons soy sauce (we use reduced sodium)
1 tablespoons rice wine vinegar
1 tablespoons ketchup
1/2 tablespoon lemon juice
dash of sesame oil
1/2 tablespoon hot mustard
1 teaspoon hot water
1/2 - 1 teaspoon garlic and red chile paste

For the stir fry sauce:
4 tablespoons soy sauce (we use reduced sodium)
4 tablespoons brown sugar
1 teaspoon rice wine vinegar

Directions:
*Before beginning recipe, have mushrooms and water chestnuts chopped, have stir fry sauce prepared.

1. Make the special sauce by dissolving the sugar in the water in a small bowl. Add the soy sauce, rice wine vinegar, ketchup, lemon juice, and sesame oil. Mix well and set aside until ready to serve. Combine the hot water with the hot mustard and set this aside as well.

2. Bring 1 tablespoon oil to high heat in a wok or large frying pan. Saute ground chicken until cooked through.

3. With the pan still on high heat, add the other tablespoon of oil. Add the garlic, onions, water chestnuts, and mushrooms to the pan. Add the stir fry sauce to the pan and saute the mixture for a couple minutes.

4. To complete the "special sauce," add your desired measurement of the mustard and garlic chili sauce to the special sauce mixture to reach preferred spiciness.

5. Serve the chicken mixture in the lettuce cups and top with "special sauce" as desired.

Wednesday, February 1, 2012

Turkey Tacos

DSC_0587_ed

I found this recipe for ground beef tacos in my America's Test Kitchen Cookbook and decided to try substituting ground turkey for the beef. The only kind of ground turkey tacos I've made in the past have been with a store bought taco seasoning packet; in fact, I don't know that it ever occurred to me to make the filling from scratch! I am so glad we tried these because they are soooo good! The spices are perfect, and the mixture is so flavorful. Bob and I have made these probably 6 times in the last few months. They are one of the few dinners that I actually made while I was pregnant to keep in the freezer and have after the baby arrived - we were sure glad to have this dinner twice in those first weeks home with Ava, when simply taking a shower is an accomplishment for the day!

I typically use lean ground turkey exclusively (not the extra-lean) because I find it has more flavor and isn't as dry. I had Bob grocery shop for the ingredients for this recipe once, and he got the extra-lean by accident. We used it anyway, and these were still phenomenal! It ended up being serendipitous because now we know that we can use the healthier turkey and not compromise on the flavor!

Turkey Tacos

Ingredients:
For the filling:
2 teaspoons vegetable oil or corn oil
1 small onion, chopped small (about 2/3 cup)
3 medium cloves garlic, minced or pressed through garlic press (about 1 tablespoon)
2 tablespoons chili powder
1 teaspoon ground cumin
1 teaspoon ground coriander
1/2 teaspoon dried oregano
1/4 teaspoon cayenne pepper
Salt
1 pound ground turkey (lean or extra-lean)
1/2 cup tomato sauce
1/2 cup low-sodium chicken broth
1 teaspoon brown sugar
2 teaspoons vinegar (preferably cider vinegar)
Ground black pepper

Optional extras:
Hard or soft taco shells
Shredded cheese
Shredded iceberg or romaine lettuce
Small tomatoes , chopped small
Sour cream
Minced fresh cilantro leaves
Hot sauce or bottled taco sauce

Directions:
1. Heat oil in a medium skillet over medium heat until hot and shimmering but not smoking, about 2 minutes. Add onion and cook, stirring occasionally, until softened, about 4 minutes.

2. Add garlic, spices, and 1/2 teaspoon salt; cook, stirring constantly, until fragrant, about 1 minute. Add ground turkey and cook, breaking meat up with a spoon and scraping pan bottom to prevent scorching, until turkey is no longer pink, about 5 minutes.

3. Add the tomato sauce, chicken broth, brown sugar, and vinegar; bring to simmer. Reduce heat to medium-low and simmer, uncovered, stirring frequently and breaking meat up so that no chunks remain, until liquid has reduced and thickened (mixture should not be completely dry), about 10 minutes.

4. Adjust seasonings with salt and pepper. Serve immediately, passing toppings separately.

Source: America's Test Kitchen Complete TV Show Cookbook

Friday, January 13, 2012

Welcome Baby Ava!


Exactly one month ago today, I gave birth to our daughter Ava! She was a great little Christmas gift for our family. Bob and I just adore her!

I can't believe it's been over 2 months since I've posted on this blog . . . I guess the holidays and preparing for a baby got the best of me! I continued to photograph recipes and have a lot of posts to share, so hopefully I'll start keeping up with things better. Learning to care for a newborn has definitely been challenging!


Happy New Year, and stay tuned for some new recipes! :)


  © Blogger template Brownium by Ourblogtemplates.com 2009

Back to TOP