Search This Blog

Tuesday, March 29, 2011

Easy Vanilla Buttercream

DSCN8143_labeled

DSCN8141_labeled

DSCN8134_labeled

Wow - it has been a long time since I last posted! I have been super busy writing grants for work and hosting my sister's bridal shower!!! I can't wait to share all the details in upcoming posts. For this one event I did my first entirely fondant-covered cake and my first dessert table! I was so pleased with how everything turned out, and my sister loved it, which made all of the work completely worthwhile.

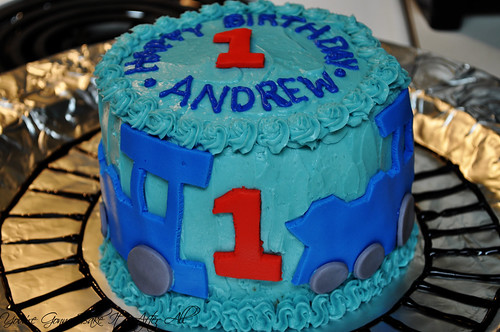
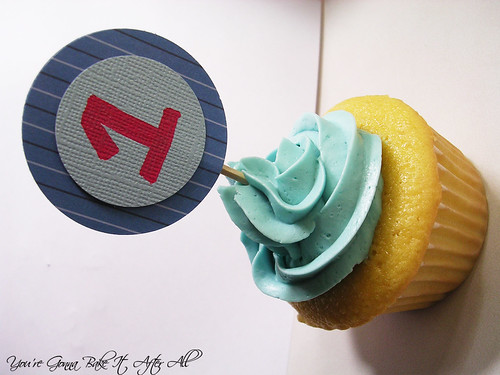
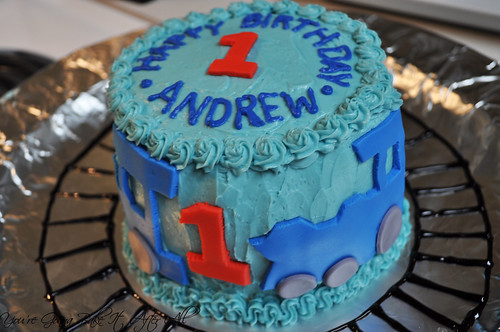
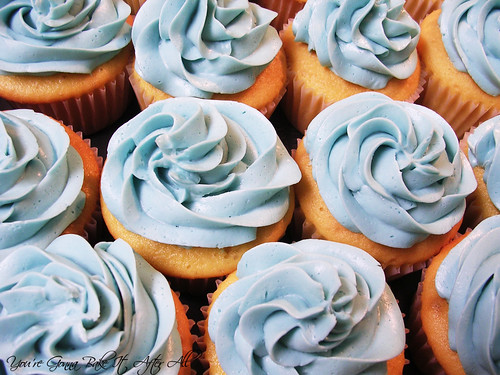
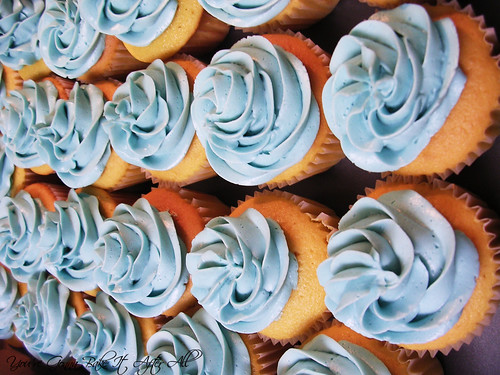
In my last post, I spoke about the 1st birthday party my friends threw for their son. I did his small cake and these cupcakes for the rest of the guests. I used a yellow cake box mix here, and am so glad I did because everyone raved about how light and fluffy the cupcakes were.

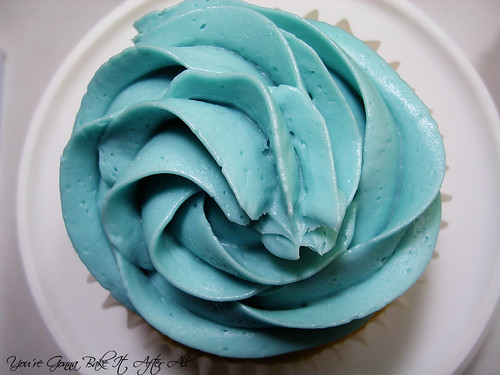
I'm not a huge fan of canned frosting, probably because my aunt makes the best homemade buttercream frosting ever (my grandma's recipe). I have never tried to replicate her recipe since she adds a little of this and a little of that until it's perfect. I decided to turn to the Test Kitchen for this Easy Buttercream recipe. I have to say, it's delicious and very, very easy! It's not quite as light and smooth as Swiss Meringue Buttercream, but takes much less time and was actually preferred over the Swiss version by my husband. This is now my go-to buttercream recipe when I need something quick and delicious.

Easy Vanilla Buttercream

Yield: makes enough buttercream to frost 12 cupcakes or a 1-layer cake; double this recipe for a 2-layer cake

Ingredients:
10 tablespoons unsalted butter, softened
1 1/4 cups powdered sugar (5 ounces)
pinch of table salt
1 1/2 teaspoons vanilla extract
1 tablespoon heavy cream

Directions:
1. In standing mixer fitted with the whisk attachment, beat butter at medium-high speed until smooth, about 20 seconds. NOTE: if using a hand-held mixer, increase mixing times by at least 50%.

2. Add powdered sugar and salt, and beat at medium-low speed until most of the sugar is moistened, about 45 seconds.

3. Scrape down bowl and beat at medium speed until mixture is fully combined, about 15 seconds; scrape bowl, add vanilla extract and heavy cream, and beat at medium speed until incorporated, about 10 seconds.

4. Increase speed to medium-high and beat until light and fluffy, about 4 minutes, scraping down bowl once or twice.

5. Tint frosting with gel food coloring, if desired. Use immediately or store in refrigerator. If refrigerated, allow frosting to come to room temperature before use.

Source: America's Test Kitchen Complete TV Show Cookbook

Wednesday, March 9, 2011

1st Birthday Cake - 1st Try with Fondant!

DSC_0068_labeled

My very good friends Jenny and Jeff recently threw a party for their son Andrew's 1st birthday. I was honored when she asked if I would make his cake. After making the monkey cookies for her baby shower last year, I wanted this cake to be very special for such a big occasion. We decided that I would make a small cake for him to get into and cupcakes for the rest of the guests. Jenny went with a train theme for the party - she decorated the tables with red table clothes and used black streamers to make "train tracks" down the length of each table. Andrew wore a shirt featuring a train and a big "1." There were pictures up around the room of Andrew from each month of his life. It's amazing to see how much he's grown!

Like most babies, Andrew had never had many sweets before. He was timid at first but then enjoyed running his tiny hands over the surface of the blue buttercream frosting. He particularly liked the fondant decorations, which was surprising and a little worrisome given their chewy/gum-like texture, so we gently encouraged him to focus more on the frosting. When he got his first real taste of the buttercream, his little legs started shaking up and down - seriously the cutest thing! Andrew seemed to enjoy his cake, and his guests really liked the cupcakes. The party was so much fun for everyone, and I hope Andrew will look at pictures and the video someday and be so proud that his parents put forth the effort for his 1st birthday . . . or at least Jenny and Jeff will have happy memories of this major milestone in the life of their first child! :)

Here are a few details on the cake:

I decided to cheat and used a box mix for the cake and cupcakes for 3 reasons, 1) the amount of cake batter I needed for 36 cupcakes and a 6" double layer cake, 2) the party was on a Saturday meaning everything had to be made on weeknights after I got home from work, and 3) cake mixes are just so darn moist and stay that way even when the cupcakes are refrigerated for a few days.

I used 2 boxes of Duncan Hines yellow cake mix (the only brand my aunt, who is the designated birthday cake baker in our family, uses). This made 36 cupcakes and 2-6" layers. I also made a double batch of Easy Vanilla Buttercream (recipe coming soon!). The cupcakes were frosted with buttercream, and these adorable toothpick toppers that Jenny made were inserted at the party:

DSCN8137_labeled

The buttercream was used to bind the 2 layers and coat the entire cake. I piped more buttercream around the top and bottom of the cake using a large star tip (I believe it's a Wilton 1M). Then I set out to conquer fondant . . .

I have been wanting to try Annie's recipe for Marshmallow Fondant for a while now, and I used her Fun with Fondant tips as a guide. I cut the recipe in half and still had much more than enough for making the decorations. I used an X-acto knife and free-handed the decorations. I just added a little more buttercream to the back of each before "pasting" them to the cake - not sure if it was necessary but I wanted to make sure they would stick.

DSC_0060_labeled

I used store-bought black gel icing to draw a train track around the cake, and Jenny found a "Thomas the Train" toy that we put on the track at the party. Coincidently, she discovered that all Thomas the Train's have a "1" on them - perfect for a 1st birthday party!!!

I think that's it! I consider my first run at fondant a success, and I'm exciting to use it again.

Like I mentioned, I'll be posting the Easy Vanilla Buttercream recipe soon! :)

Marshmallow Fondant

(Note: This is a half batch)

Ingredients:
vegetable shortening, for greasing bowls
8 ounces plain marshmallows (1/2 bag)
1 tablespoon water
1 teaspoon clear flavoring (such as vanilla extract)
1 pound powdered sugar, divided
pinch of salt

Directions:
1. Using the shortening, generously grease a large microwave-safe bowl, the bowl of the stand mixer, a spoon/spatula (or two), and the mixer dough hook.

2. Add the marshmallows and water to the prepared microwave-safe bowl and microwave for 60 seconds. Stir with the greased spatula/spoon. If not all the marshmallows have melted, microwave for 30 more seconds. Stir in the flavoring.

3. Reserve 1/2 cup of the confectioners’ sugar and add the rest to the bowl of the stand mixer, along with the salt. Create a well in the center. Pour the marshmallow mixture into the well and turn the mixer on to the lowest setting. When the mixer sounds strained, turn the speed up one setting. Turn off the mixer once all the sugar has been incorporated. If the fondant is sticky, add the reserved sugar 2 tablespoons at a time until it is no longer sticky. (I did not need any of the reserved sugar!)

4. Turn the fondant out onto a piece of plastic wrap. Rub a bit of shortening on the outside of the ball. Wrap tightly with the plastic wrap, place it in a resealable plastic bag and let rest for at least 2-3 hours. Keep the unused portions covered when not in use. If the fondant becomes stiff, microwave for 20 seconds at a time until it becomes pliable.

Source: Adapted from Annie's Eats

Friday, March 4, 2011

Homemade Turkey Soup

DSCN7919_labeled

DSCN7924_labeled

Turkey soup is one of my favorite winter meals. It just screams cold weather to me, and nothing is as warm and comforting as a big bowl of this soup. Whether you come down with a bad cold virus or come in from a day of playing in the snow, this soup is the perfect remedy.

After hosting our first Thanksgiving, I was completely wiped out and the thought of making turkey soup was too daunting to tackle, but I absolutely could not give up the opportunity to make my beloved turkey soup. I threw the turkey carcass in the freezer and saved it for another day. On one of my days off after Christmas, I invited my mom over to teach me how to make her turkey soup. She doesn't have a written recipe, so I tried to document what we did along the way.

Much of this recipe is adaptable to your personal taste; put in what you like! I like to just make enough of the soup with noodles for one meal to avoid the noodles getting overly soft. I love the texture of al dente wide egg noodles in this soup. Cooking the noodles in the soup itself gives them a fantastic flavor, adds a little starch to the broth, and omits the use of an extra pot - added bonus! As I mentioned earlier this week, it may be March but I'm not convinced the winter weather is behind us, so there are plenty more turkey soup days left!

Homemade Turkey Soup

Ingredients:
For the stock:
1 tablespoon oil (I used extra-virgin olive oil)
4 carrots, peeled and rough chopped
2 sweet yellow onions, rough chopped
5 ribs of celery with tops, rough chopped
1 tablespoon kosher salt
1/2 teaspoon ground pepper
leftover turkey parts, with some meat left (I had the carcass of a 22 pound turkey)
chicken bouillon, optional
parsley (dried or fresh), thyme, poultry seasoning, to taste

For the soup:
Amount vary according to taste:
carrots, cut lengthwise then chopped into 1/4" thick slices (or however you prefer)
yellow onion, chopped
celery, chopped (optional)
wide egg noodles

Directions:
1. Make the stock: In a 10-quart stock pot, heat the oil over medium heat. Add the carrots, onions, celery, salt, and pepper. Cook until vegetables are softened slightly.

2. Add the turkey parts and fill the pot to the top with water. Heat to a simmer, then reduce heat to maintain a simmer for approximately 2 hours or more.

3. Using a fine-mesh strainer set over a large bowl, pour the stock into the strainer to remove vegetables and turkey parts. Return the stock to the pot and set aside.

4. Assemble the soup: Carefully pick through the stock solids/turkey parts to remove the turkey meat. Add it back to the stock. At this point, add any other veggies you would like in your soup (I added a little yellow onion and some carrots). Season to taste with poultry seasoning, thyme, parsley, salt, and/or pepper. If the stock lacks a bold poultry flavor, you may add some chicken bouillon to bump it up (I did not have to do this).

5. Return pot containing soup to a burner and heat to a simmer until veggies are cooked through. Remove the pot from heat, let cool slightly, then place in refrigerator. The fat will rise to the top of the soup and can be skimmed off later.

6. Finish the soup: When ready to eat the soup, make sure fat has been skimmed off, add as much soup as you'd like to a pot and heat to a boil, add dry egg noodles and cook until al dente. Taste to make sure seasoning is to your liking, and serve soup immediately. The longer the soup sits, the softer the noodles will be.

Source: My mom

DSCN7926_labeled

Wednesday, March 2, 2011

Mashed Potatoes and Root Vegetables

DSCN8077_labeled

I realize it's now March (how did that happen?!), but it's still chilly in these parts so I have a few more winter recipes for you. I wanted to make these mashed potatoes the moment I first flipped through my America's Test Kitchen cookbook last March, but decided to wait for winter for the seasonal produce. Although the recipe calls for some vegetables I have NEVER worked with (or eaten for that matter!), it just sounded so wintery and hearty.

I am SO glad we made this recipe because these mashed potatoes are the BEST ever!!! Bob and I both agreed that they are our favorite mashed potatoes of all time - better than any restaurant or homemade version. The root veggies are caramelized in butter, which brings out a distinct sweetness. The potatoes are unbelievably creamy in texture (thanks to the butter and half-and-half), while still maintaining small chunks of potato so you know it's the real stuff. We served these with a delicious chicken recipe I'll be posting soon!

Mashed Potatoes and Root Vegetables

Serves 4

Ingredients:
4 tablespoons (1/2 stick) unsalted butter
8 ounces carrots, parsnips, turnips, or celery root, peeled; carrots or parsnips cut into 1/4-inch thick half-moons; turnips or celery root cut into 1/2-inch dice (about 1 1/2 cups)*
1 1/2 pounds Yukon Gold potatoes (about 3 medium), peeled, quartered lengthwise, and cut crosswise into 1/4-inch-thick slices; rinsed well in 3 or 4 changes of cold water and drained well
1/3 cup low-sodium chicken broth
Table salt
3/4 cup half-and-half, warmed
3 tablespoons minced fresh chives, optional
Ground black pepper

*I used all 4, approximately 2 ounces of each.

Directions:
1. Melt the butter in a large saucepan over medium heat. Add the root vegetables and cook, stirring occasionally, until the butter is browned and the vegetables are dark brown and caramelized, 10 to 12 minutes. (If after 4 minutes the veggies have not started to brown, increase the heat to medium-high).

2. Add the potatoes, broth, and 3/4 teaspoon salt, and stir to combine. Cook, covered, over low heat (the broth should simmer gently; do not boil), stirring occasionally, until the potatoes fall apart easily when poked with a fork and all the liquid has been absorbed, 25 to 30 minutes. (If the liquid does not gently simmer after a few minutes, increase the heat to medium-low). Remove the pan from the heat; remove the lid and allow the steam to escape for 2 minutes.

3. Gently mash the potatoes and root vegetables in the saucepan with a potato masher (do not mash vigorously). Gently fold in the half-and-half and chives. Season with salt and pepper to taste and serve.

Source: The Complete America's Test Kitchen TV Show Cookbook

  © Blogger template Brownium by Ourblogtemplates.com 2009

Back to TOP